
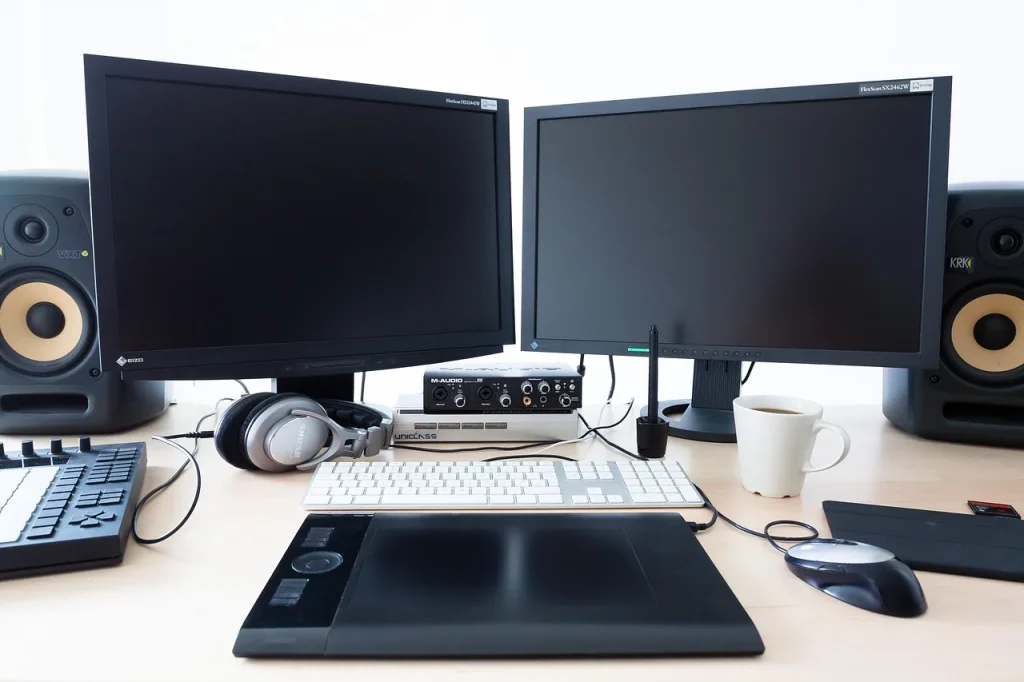
This guide aims to give you a clear, practical checklist. It covers choosing a computer (Intel i5 or Ryzen 5, 8 GB of RAM, SSD ≥ 256 GB), free DAWs (GarageBand, Audacity, Cakewalk), and what you need to record your first vocal track.
Computer-based music production is becoming accessible. You can start with a USB microphone (Blue Yeti) or an XLR microphone (Audio‑Technica AT2020) and a simple interface (Focusrite Scarlett Solo, Behringer UMC22). Closed-back headphones such as the Sony MDR‑7506 or ATH‑M50x make critical listening easier.
This guide lays out the path: compose, set up a home studio, install a DAW, adjust the buffer, and follow a workflow (preparation, recording, editing, light mixing). To save time and avoid common mistakes, also see how to get started with music production. If you have questions, the method applies whatever your style.
Why computer-based music production makes a difference today
Today, a laptop can house a complete, reliable studio. The reality is simple: recording, editing, and mixing can now be done on one compact machine. Free software and affordable interfaces have made production accessible to everyone.
From bedroom to virtual studio: accessibility and today’s reality
A free DAW such as GarageBand or Cakewalk lets you start without spending anything. Paired with a small interface and a microphone, the computer becomes the foundation of a real home studio.
Latency can be managed with a dedicated interface. Direct monitoring prevents delay and makes recording vocals and instruments comfortable.
What computer-based production offers beginner singers and producers
Recording yourself provides a sonic mirror: hearing your voice and arrangement choices helps you improve quickly.
- Create convincing demos and share usable sounds on social media.
- Experiment with harmonies, beats, and sampling without paying for studio time.
- Revise quickly: the tool reveals mistakes and speeds up learning through experimentation.
For producers, computer-based music production makes it easier to layer virtual instruments, program parts, and arrange multiple tracks. In short, the computer becomes the studio’s central hub and brings an idea to an audible result in less time.
Building a basic home studio: essential components and their roles
Setting up an effective home studio means prioritizing a few essential pieces of equipment. Start with a reliable computer, an audio interface, a suitable microphone, and neutral monitoring.

Computer: the heart of the setup
Aim for an Intel i5 or Ryzen 5 processor, at least 8 GB of RAM (16 GB recommended), and an SSD ≥ 256 GB.
Tip: keep an external drive or NAS for archives and large sample libraries.
Audio interface: conversion and latency
A 2 × 2 interface (for example, a Focusrite Scarlett Solo) improves conversion and provides direct monitoring. Budget models such as the Behringer UMC22 are still suitable for getting started.
Choose quality preamps, phantom power if you use an XLR microphone, and a Hi‑Z input for guitar.
Microphones: USB or XLR
A USB microphone (Blue Yeti) works if simplicity is your priority. For better quality and more room to expand, choose an XLR microphone (Audio‑Technica AT2020) connected to the interface.
A pop filter and stand are inexpensive purchases that immediately improve your recordings.
Headphones and studio monitors
Use closed-back headphones (Sony MDR‑7506, ATH‑M50x) for recording and, if possible, open-back headphones for mixing.
For monitors, look for balanced XLR/TRS inputs and a neutral response. An 8″ woofer or a subwoofer can help if your music calls for deep bass.
- Line connections: choose shielded balanced cables to reduce noise.
- Cost: invest first in the microphone and monitoring; save money on accessories.
- Expandability: an interface with MIDI and ADAT can spare you from replacing everything later.
Optimizing your workspace: acoustics, ergonomics, and organization
A good layout can turn even a small room into a reliable listening space. Position your desk and monitors along the room’s length to create a stable listening area. Form an equilateral triangle between the monitors and your seat.
Apply light acoustic treatment: panels at the first reflection points, bass traps in the corners, and diffusers behind you. Move the monitors away from the walls and choose front-facing ports if space is limited.
Monitoring becomes more reliable if you make small adjustments to the monitors’ EQ to compensate for the room instead of forcing the mix. If the room remains imperfect, use closed-back headphones to record and check your decisions.
Pay attention to ergonomics: keep the keyboard, interface, and controller within reach, set the screen at a comfortable height, and adjust your chair. Choose adjustable LED lighting and eliminate glare. Tidy cables with raceways and hook-and-loop ties; separate audio lines from power cables.
Practical summary
| Action | Benefit | Recommended tools |
|---|---|---|
| Placement along the room’s axis | Stable listening area | Desk, monitor stands |
| Light acoustic treatment | More neutral response | Panels, bass traps, diffusers |
| Organization and lighting | Less fatigue, better quality | Cable raceways, LEDs, cable ties |
These simple adjustments protect the quality of your sessions and keep the creative process flowing in your studio. They help you get the most from your tools and produce more cohesive music.
Choosing a DAW: from free to professional, find the right tool for your style
The software that runs your studio should suit the way you work. On a computer, compatibility and stability matter as much as ease of use.
Free options: Audacity is useful for quick recording and cleanup. GarageBand (Mac) is intuitive and includes instruments. Cakewalk by BandLab provides an environment similar to professional software on Windows.
Paid options: Logic Pro stands out on Mac for its stability and sound libraries. Ableton Live supports live performance and loop-based work. Cubase Elements remains a good entry point for precise editing.
DAWs share common features: audio and MIDI track areas, a timeline, a mixer, editing tools, and an instrument browser. These features let you organize, correct, and mix your recordings.
Practical advice: try demo versions, follow a short getting-started guide, and check that your computer can handle the load. Manage monitoring to limit latency and choose an ecosystem (plugins, tutorials, controllers) that will speed up your sessions.

Essential virtual instruments, effects, and plugins for getting started
Synths and samplers turn an ordinary computer into a complete sound-making toolkit. Virtual instruments include synthesizers, pianos, strings, and samplers built into the software. They help you shape basic sounds for your projects.
To begin, assemble a minimal set: one versatile synth (such as Serum or Massive), a simple sampler, and a small library of useful presets. This trio often covers 80% of your needs.

The essential effects are straightforward: reverb to place a sound in a space, delay for rhythmic depth, a compressor to steady the level, and EQ to shape the sound. Learn four key controls across these effects: wet/dry, time, threshold/ratio, and gain.
Organize sounds on your computer with folders by instrument, tags, and favorites. Buy or explore reputable libraries (Splice, Loopcloud, Noiiz). Check that plugins (VST, AU, AAX) are compatible with your DAW and operating system.
For focused editing outside the DAW, use Audacity or similar software to clean up and export files quickly. When mixing, favor a few well-adjusted effects over stacking plugins without a purpose.
To complete your hardware setup, also see which equipment to choose so your instruments, interface, and software work well together.
MIDI controllers and connections: speed up your creative workflow
The right controller changes how you interact with the software. This practical choice reduces setup time and makes writing music easier.
Which format should you choose? A 25- or 49-key keyboard is compact and ideal for programming. Models with 61 or 88 keys suit pianists who want a natural playing experience. Pads (8, 16, or 64) are useful for making beats and triggering clips.

Integration and mapping
Connect the controller by USB and check whether it needs a driver. For older equipment, use the MIDI In/Out ports on your interface.
MIDI mapping lets you assign faders and knobs to DAW controls. Use the supplied scripts or Automap to save time and work without a mouse.
Studio practices and tips
- An important distinction: MIDI transmits commands, while audio travels along its own path.
- Keep the controller within reach to use mute, solo, and live automation.
- For producers, choose pads that respond to velocity and aftertouch.
- Work on headphones at night: a good pair reveals nuances and avoids disturbing the neighbors.
Time-saving tip: create DAW session templates with your usual mappings. You can then start a session in under a minute and expand your setup without replacing all your equipment.
For more detail on setting up step by step, follow this training tutorial.
Your first steps in music production: a beginner’s checklist
Before pressing Record, follow a simple procedure to protect your equipment and save time.
Prepare and connect: a simple order
Turn everything off. Connect the audio interface to the computer, plug the microphone (XLR or USB) into the interface, then connect the headphones to the interface’s headphone output.
Next, turn on the interface, then the computer. Open the DAW. This order limits pops and device detection errors.
Set up the DAW: devices, buffer, monitoring
Select the interface as the DAW’s input and output device.
Set the buffer to 128 to 256 samples for a good balance between latency and stability.
Create a mono audio track, name it (for example, “Lead Vocal”), and arm it. If possible, enable direct monitoring for zero latency.
Set levels: gain, distance, and pop filter
Sing your loudest passage and aim for peaks between -12 dB and -6 dB.
Place the microphone 15–20 cm away, slightly off-axis, with a pop filter. Check the line cables (XLR/TRS) and the condition of the stand.
Record a 30-second test, listen back on headphones, and write down your basic settings.
Recording your first vocal: a simple, effective method
A good recording starts with a quiet room, steady posture, and controlled levels. First reduce noise from ventilation and traffic, and dampen early reflections with blankets or cushions. Choose a spot away from the walls to limit unwanted reverberation.
Posture and distance: keep your back straight, your neck relaxed, and your feet firmly on the floor. Stay a consistent 15–20 cm from the microphone and mark your position on the floor so you can return to it for each take.
Use closed-back headphones for monitoring and set a comfortable mix of voice and instruments. Watch the level: aim for peaks between -12 dB and -6 dB, and lower the gain if the singer projects too strongly.
Record 3 to 5 complete takes, then note your impressions after each one.
Use comping in the DAW: assemble the best sections into the strongest performance, favoring emotion and rhythm over technical perfection alone.
| Action | Why | Tip |
|---|---|---|
| Dampen the room | Reduces echoes and sibilance | Blankets, cushions, distance from walls |
| Keep the distance steady | Maintains dynamics and quality | Mark your position, use a pop filter |
| Record multiple takes | Lets you choose sections and practice comping | 3 to 5 takes and retakes of key phrases |
Improve a vocal recording quickly: basic mixing techniques
Vocal clarity in a mix often depends on careful cleanup before any other processing.
Cleanup and editing
Start with editing: cut unnecessary silences, remove clicks, and soften plosives with fades; use a de‑esser for sibilance.
Fix small noises between phrases and keep multiple takes in the DAW for comping.
Level balance and automation
Normalize cautiously to -6 dB, then use automation to smooth out variations.
Adjust the level phrase by phrase instead of flattening the dynamics with too much compression.
EQ and reverb
Apply a high-pass filter at 80–120 Hz and reduce frequencies between 200 and 400 Hz if the track sounds muddy.
Boost frequencies between 1 and 3 kHz for presence, and add a little between 6 and 12 kHz for air.
Choose a plate or room reverb: 10–25% wet, a time of 1–3 s, and 20–80 ms of pre‑delay to preserve the attack.
Controlled compression
Set the ratio between 3:1 and 4:1, attack between 10 and 30 ms, and release between 100 and 300 ms. Aim for no more than 3 to 6 dB of gain reduction and apply makeup gain sparingly.
Work step by step: editing, levels, EQ, reverb, compression. Test on headphones and monitors to check how the voice sits in the music.
- Route reverb and delay to buses to control the tracks consistently.
- Save snapshots at each stage so you can go back if needed.
Project management: organization, backups, and maintenance
Good project organization prevents lost files and hours of searching. Adopt a simple folder structure when you create a project, and name each version with a date and number.
Folder structures and naming
Recommended structure: Project/Audio, Project/Sessions, Project/Exports, Project/Stems. Name files “YYYYMMDD_name_v1” so you can identify versions quickly.
Local, NAS, and cloud backups
Automatically make a local backup to an external drive or NAS at the end of each session. Add an encrypted copy on Dropbox or Google Drive to guard against failure or theft.
Updates and equipment care
Keep your software and plugins up to date. Maintain the computer by removing dust, checking available disk space, and inspecting cables. Clean the microphone, headphones, and interface; replace worn cables.
Save time by using session templates and keeping your licenses and serial numbers together.
| Action | Benefit | Recommended tool |
|---|---|---|
| Clear folder structure | Find files quickly | Standard naming and a README |
| Two backups | Protection against failures | External drive or Dropbox |
| Storage optimization | Better DAW performance | SSD for active projects, HDD/NAS for archives |
| Regular maintenance | Fewer interruptions | Dust removal, updates, restore test |
Make a backup at the end of every session. It should become a habit.
Common pitfalls to avoid when starting a home studio
Before buying expensive equipment, identify what your project actually needs. Do not confuse wants with needs: a good microphone and suitable headphones are often enough to start.
Do not use price as your only guide. An affordable interface set up well does more for you than a poorly integrated high-end model.
The room’s acoustic reality matters. Treat early reflections and position your monitors correctly before changing equipment.
Clarify your questions about monitoring: neutral playback helps you make better decisions than a hi‑fi system that flatters the sound.
Avoid overloading tracks with effects. Start with limited processing (EQ, compression, subtle reverb) and adjust it to serve the music.
Always check latency (buffer), levels (-12 to -6 dB), routing, and your interface drivers before recording.
Make a 30-second test recording, save two copies (one locally and one in the cloud), and note your settings for consistency.
- Write down gain settings, distances, and presets.
- Make backups consistently.
- Ask for help on forums or consult tutorials as soon as you run into a problem.
Conclusion
Combine equipment, method, and repetition to improve your sound quickly.
Computer-based music production makes producing music accessible. A simple home studio, a capable computer, a quality audio interface, and neutral headphones are enough to get off to a good start.
Prioritize useful equipment and control your monitoring. Add a few virtual instruments and stable software. Adjust gain, keep levels between -12 and -6 dB, and follow the power-up and connection procedure.
Back up your files, keep plugins up to date, and improve through repeated practice. Open a session, record a track, apply EQ, light compression, and reverb, then refine the mix.
To complete your equipment list and estimate the cost of a suitable setup, see the home studio equipment page. This guide gives you a foundation: creativity grows with practice and curiosity.