
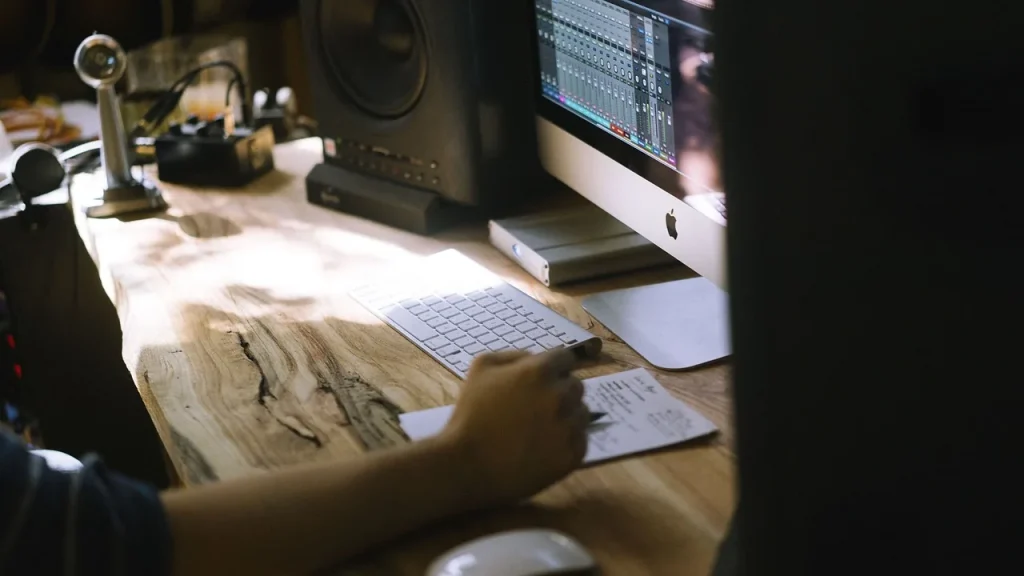
Welcome: this guide takes you step by step from an idea to a structured track. It connects theory with practice and lays the foundations for coherent music production.
Today, DAWs such as Ableton Live, FL Studio, Logic Pro, Reaper, Cubase, Pro Tools and Studio One let you create, record, edit, mix and produce music at home. A recent computer with a multicore processor is enough to get started.
This guide covers the minimum setup, choosing software, preparing a session, rhythm, bass, arrangement and mixing. Its aim is to give you proven methods to save time, move beyond a four- or eight-bar loop and finish a piece of music you can be proud of.
Digital tools offer a wealth of possibilities. Follow the steps in order or choose those that meet your needs. For practical resources, see this guide to learning computer music production.
learn computer music production
Why this guide now: lay the foundations for successful computer music production
Now is an ideal time to build a solid foundation and turn an idea into a finished composition.
You can get started without an expensive studio, using a recent computer with a multicore processor.
Music production software offers many similar features. Starting with one DAW, setting it up and using project templates makes creating music easier.
To build a track, decide on its tempo, time signature, section outline, sound elements and export plan from the outset. This keeps you from getting lost among tools and effects.
You can get past the learning curve by planning short, regular sessions. Choose reference tracks to stay focused on your artistic direction.
Use resources and music production courses to learn the fundamentals faster and explore what is possible today.
Understanding computer music production and its role in electronic music
Computer-assisted music creation has moved from laboratories into bedrooms and studios.
Computer music has roots in Max Mathews’s work on MUSIC-N in the 1950s and 1960s. The first digital workstations appeared in the late 1980s and early 1990s. Pro Tools, Cubase and Logic led the way, and DAWs became more widely available during the 1990s.
From early history to current practice: tools become widely available
Today, a single computer brings together a sequencer, virtual instruments, samplers, effects and a mixer. DAWs combine recording, editing and mixing. This integration speeds up music production and makes remote collaboration easier.
Essential terms for beginners
A shared vocabulary helps you make progress quickly. Here are the concepts to know:
- BPM: the track’s tempo.
- Automation: changes to parameters over time.
- Compressor and equalizer: dynamic control and frequency balance.
- ADSR, LPF and HPF filters, audio and MIDI tracks, buses, sends, gain staging, phase and sidechain processing.
- Instruments, both physical and virtual, and samples: their roles and uses.
| Period | Key development | Examples |
|---|---|---|
| 1950s and 1960s | Research and synthesis with MUSIC-N | Max Mathews |
| Late 1980s and 1990s | Emergence of DAWs | Pro Tools, Cubase, Logic |
| Today | Integrated DAWs and collaboration | Ableton Live, FL Studio, Reaper |
To save time, consult the relevant sections of your DAW’s manual. Understanding these basics makes your workflow smoother and lessons more useful.
The minimum setup for getting started in France today
Prioritizing stability helps you produce faster and with less frustration.
Computer, headphones and MIDI controller: the essentials on a budget
Recommended setup: a recent computer with a multicore processor.
Use a mouse for precise editing. Reliable monitoring headphones are preferable to speakers in an untreated room.
A MIDI controller compatible with your DAW helps you capture ideas faster. It also makes live playing and parameter control easier.
Audio interfaces and peripherals: when and why to add them
Add an audio interface when you record a voice or an instrument. It reduces latency and improves audio conversion.
Build your setup in stages: add a MIDI keyboard, pad controller or mixing surface according to the part of your workflow you want to speed up.
| Equipment | Why it helps | When to buy it |
|---|---|---|
| Computer with 16 GB of memory and an SSD | Stability and shorter loading times | From the start |
| Monitoring headphones | Neutral listening in an untreated room | As a priority |
| Audio interface | Recording, lower latency and better quality | When you record a voice or instrument |
| MIDI controller | Real-time creation and control | When you have found one compatible with your DAW |
Budget and approach: buy according to your actual needs and upgrade in stages. Set the buffer size for the task: lower for real-time playing, higher for mixing.
Backups: automate backups to an external drive or the cloud to protect your projects and sounds.
Choosing and optimizing your music production software (DAW)
Your choice of software directly affects how quickly you can turn ideas into finished work and shapes your creative habits. All DAWs offer a sequencer, virtual instruments and effects, but each has its own workflow.
Ableton Live, FL Studio, Logic Pro and Reaper: strengths and uses
Ableton Live stands out for its Session View, which is useful for live performance and sketching ideas. FL Studio is known for its step sequencer and pattern-based workflow. Logic Pro appeals to macOS users through its built-in instruments. Reaper remains lightweight and highly customizable.
Setting up a project quickly
Set the BPM and time signature when you open the project. Name each track clearly and create an orderly file structure. Save a project template with effect buses for reverb and delay, along with folders for drums, bass, melody, pads and effects.
Interface and controllers: saving time
Map your MIDI controllers to software parameters and create macros for repetitive actions. Organize your sound and plugin libraries so you can find presets easily. To reduce processor load, freeze or render tracks and favor lightweight versions of your plugins.

Preparing the session: tracks, routing and levels
A well-organized session lets you stay in control of every element. Start by creating tracks for each family: drums, bass, harmonies, vocals and effects. Route each family to its own bus so you can adjust its overall level quickly.
Make an initial rough mix by gradually raising the faders: kick and bass, percussion, vocals, then pads and effects. Keeping levels reasonable leaves headroom on the master track and prevents clipping.
Apply gain staging to every element. Check phase in the mixer and use panning in moderation to maintain mono compatibility.
- Name and color-code tracks so you can identify elements quickly.
- Mark sections with locators: intro, build, drop and break.
- Set up utility tracks: click, sidechain, reference and premaster bus.
Suggested export: 44.1 kHz at 16 or 24 bits for listening copies. Save successive versions of your track to document your progress and allow you to go back.
Computer Music Production and Electronic Music: Key Methods
Starting by transcribing an idea played on the piano helps you build a coherent track.
Why transcribe?
Transcription provides a solid harmonic and melodic foundation. It helps you move beyond four- or eight-bar loops and gives the arrangement a point of reference.
Two simple options
Keep the piano take as it is if its expression suits the track. You can also convert it to MIDI and use a virtual instrument, such as Keyzone Classic, to change the timbre.
Rhythm and timing
Choose a BPM, turn on the metronome and play in time. Accurate playing makes grid corrections easier and speeds up editing.
Building the track step by step
Add the elements in this order: accompaniment, melody, pads, drums, bass, transitions and effects.
- Things to check: key, chord progression, inversions, simple motifs and an eight-bar structure.
- Limit your initial sound choices to keep the whole track coherent.
- Develop elements through small variations to preserve the track’s identity.
- Write down your workflow so you can reuse this foundation in other projects.
Transcribing your initial piece into the software
Putting your performance into an editable format lets you correct notes and timing quickly.
Use audio or MIDI for this step, depending on your instrument and the result you want.
Audio or MIDI: choosing the right method for your instrument
- Audio (acoustic piano): highly realistic, but the result depends heavily on the microphone and room.
- Digital piano through an interface: faithful sound and low latency if the computer is configured properly.
- MIDI and a virtual instrument: full control over note editing and timing.
Virtual instruments and VSTis: pianos, synths and plugins
Start with accessible virtual instruments: Keyzone Classic, Piano One or Dexed for synth sounds. Load the plugin onto a MIDI track in your DAW, arm the track and record.
Put each hand on a separate MIDI track for finer editing of inversions and dynamics.
Quantization, the grid and timing: staying on the beat
Set the tempo with the metronome before recording. Choose a grid of quarter notes, eighth notes or sixteenth notes to suit the style and the rhythmic detail you need.
Adjust quantization strength, add swing if needed and correct note attacks by hand to avoid an overly mechanical result.
Pay attention to velocity and articulation to bring phrases to life. Name tracks clearly and identify their role and scale.
| Option | Advantage | Drawback | When to choose it |
|---|---|---|---|
| Audio (microphone) | Realism and expression | Acoustic constraints | Professional recording |
| Interface (digital piano) | Fidelity and simplicity | Requires an interface | Home studio with a keyboard |
| MIDI and virtual instrument | Full note editing | Less organic timbre | Correction and experimentation |
Adding a background pad for space and scale
A background pad turns a chord progression into a coherent soundscape.
Define its role: the pad should create a wide, enveloping space that supports the melody and accompaniment without masking them.
Choose sustained timbres, such as resonant strings, choirs or sustained pianos, instead of percussive sources. These sounds fill the stereo field without competing with transients.
Use the existing chord progression and try different inversions. Place the pad an octave above or below the accompaniment to prevent overlap and muddiness.

Shape the envelope with a soft attack and a long release. This element should blend into the groove and follow the transitions.
- Work on stereo width while maintaining a solid center for mono compatibility.
- Add a subtle layer of effects, such as reverb or delay, to blend the pad with the rest of the track.
- Automate the filter or volume gently to create movement that follows the arrangement.
Programming drums and groove without overcrowding the track
Groove often depends on careful sound selection and rhythmic placement.
Selecting kicks, snares, hi-hats and percussion that work together helps prevent frequency clashes. Listen to demos on Splice or in other sample libraries to assess their timbres.
Kick, snare, hi-hat and percussion: selecting the right sounds
Place a kick on beats 1 and 3, a snare on beats 2 and 4, and a hi-hat on eighth notes. This clear foundation quickly gives the track structure.
Basic rhythms and variations over eight bars
Program an eight-bar loop, then add small variations: drum fills, open hi-hats and ghost notes. These changes maintain interest without disrupting the groove.
Rhythmic layering and natural velocity variation
Layering two complementary snares enriches the texture without muddying the frequency spectrum. Vary velocity and shift some hits slightly to make the rhythm feel more human.
Samples and sound libraries: finding elements that suit the style
Organize tracks into groups—kick, snare, hi-hats and percussion—so you can process and automate them faster. Use subtle transition effects, such as reversed sounds, light reverbs or delays, to connect sections.
| Action | Benefit | When |
|---|---|---|
| Eight-bar foundation | Stable starting point | Beginning of production |
| Measured variations | Maintains interest | Arrangement |
| Layering | Richer texture | Mixing |
| Humanization | Organic feel | Finishing |
Applying this technique in stages helps you build tracks efficiently and repeat the process.
Composing a bassline that supports the track
The bassline provides a harmonic and rhythmic foundation. Start with the roots of the chords—for example, E minor, C major, G major and D major—and play E, C, G and D to establish an immediate tonal connection.
Following the roots and adding passing notes
Begin by playing the roots over one or two bars. Then add a few passing notes to avoid monotony without losing the foundation.
Kick and bass interaction: sidechain processing and timing
Identify the kick’s main beats and align the bass line with those attacks. Leave rests so the kick has room to breathe.
- Start with the roots, then add passing notes.
- Align the line with the kick: synchronize attacks and leave rests.
- Set up precise sidechain processing to control the level without losing energy.
- Choose the right instrument: a sub-bass synthesizer or virtual electric bass.
- Refine articulation and keep the other low-frequency elements in check.
- Try several versions and listen at low volume to judge the bass’s place in the track.
Arranging and developing the different elements
Defining the track’s direction helps you control its energy over time. Mark out each section—intro, build, drop and break—and give it an emotional purpose.
Sections, transitions and automation for dynamics
Set section lengths in blocks of eight or sixteen bars and add timeline markers.
Program simple automation for cutoff frequency, volume, reverb and panning. These changes create movement without rewriting the parts.
Building a coherent intro, drop and break
Introduce and then gradually remove elements to develop the listening experience. Vary density and register to mark moments of tension.
- Create convincing transitions with risers, impacts, reversed sounds and filters.
- Keep melodic motifs and the bassline consistent.
- Try different orders by duplicating scenes, for example in Ableton Live, before finalizing the arrangement.
Tip: automate spectral density to guide the listener, and vary elements sparingly to preserve the track’s identity.
Mixing and audio effects: clarity, depth and cohesion
Mixing turns a good arrangement into a clear, deep and cohesive track. Start with a rough balance: set levels carefully, group tracks by family and use panning in moderation to maintain mono compatibility.

Gain staging, equalization, compression and phase control
Set levels first to preserve headroom. Use equalization to reduce frequency overlap and give each source its own space.
Compress when it helps the groove: drums, percussion and buses can gain control and character. Check the phase relationship between kick and bass to preserve their impact.
Reverb, delay and mid/side processing for space
Use return tracks to share audio effects. Reverb and delay on these tracks can unify the ambience without weighing down the mix.
Use mid/side processing to widen the stereo image while keeping a solid center. A wide ambience adds depth without sacrificing presence.
References, listening on different systems and exporting
Check the result with analysis tools—a VU meter, spectrum analyzer and correlation meter—and compare it on speakers, headphones and a phone. Work at a moderate volume and take breaks.
Export with controlled headroom at 44.1 kHz and 16 or 24 bits. These practices support music production and preserve the track’s dynamics.
| Step | Goal | Suggested tool |
|---|---|---|
| Gain staging | Headroom and clarity | VU meter and faders |
| Equalization | Clean up frequencies | Parametric equalizer |
| Compression | Control and impact | Compressor on buses and drums |
| Ambience | Stereo depth | Reverb and delay on return tracks |
| Checking | Compatibility and consistency | Analysis plugins |
Creative techniques to enrich your music production
Creative techniques turn a simple motif into a living soundscape.
Sampling: chop, stretch, reverse and transpose a sample to create patterns and textures. You can use time stretching, reversal or transposition to surprise the listener.
Sampling, chopping, stretching and transposition
Chop a loop into fragments. Stretch one section into a pad. Transpose a fragment to create an unexpected rhythmic motif.
Sound design and synthesis
Combine subtractive, FM and granular synthesis. Layer oscillators and instruments to give sounds width and body.
Automation, return tracks and parallel effects
Automate macros and transitions between parameters to create movement. Use shared return tracks for reverb and delay, and parallel compression to make the sound denser without crushing it.
“Always compare how this effect sounds in the mix before and after you apply it.”
- Stack effects, then compare the result.
- Explore modular plugins and effect chains to experiment faster.
- Save your presets so you can reuse your discoveries.
In short: these creative possibilities should serve a clear purpose. Use them to add depth to your music production.
Keep improving: music production courses, methods and mindset
Lasting progress requires a clear learning plan and regular habits. Two formats meet most needs.

Training options
One-to-one coaching: personalized Ableton Live guidance to overcome specific obstacles. Ideal if you have a particular need.
Group training: one month, with four online sessions on Thursdays from 6:00 to 8:30 p.m. An intensive pace, group motivation and feedback from fellow learners.
Routine and good practices
Work with a specific focus: short sessions, clear goals and a recap at the end. Keep structured notes on shortcuts, presets and effect chains.
Reuse project templates and proven techniques to save time and develop a consistent sound.
| Format | Duration | Benefit |
|---|---|---|
| One-to-one coaching | Personalized session | Helps you quickly overcome obstacles in Ableton Live |
| Group training (four sessions) | One month, with four 2.5-hour sessions | Structure, discussion and steady progress |
| Resource | Ableton manual | Comprehensive guide to effects, synths and their uses |
“Patience, curiosity and regular feedback speed up music creation.”
Set your priorities, choose a suitable course and structure your work so you can keep going without losing heart.
Conclusion
To finish a track, follow a simple method: start with a clean foundation, build each element, then develop the structure section by section.
Remember the essentials: a minimum setup, choosing software, preparing tracks, careful transcription, pads, drums, bass, arrangement and mixing. Manage your time in short stages and record your decisions.
Listen on several systems, then adjust levels and effects sparingly. The notes and bassline should remain clear; the sounds and instruments should each have their place in the frequency spectrum.
Continue learning through courses, resources and guided experiments. Aim to finish tracks regularly. That is how your music production improves in a concrete and lasting way.