
Goal: provide a clear glossary of the most common English words you will encounter in a DAW and a home studio.
A digital audio workstation is where you compose, arrange and mix music. Well-known examples include Ableton Live, Cubase, Logic Pro, Reaper and Maschine. Key concepts include plugins/VSTs, MIDI, WAV, samples, automation, side-chain compression, mixing and mastering.
Understanding these words makes it easier to navigate menus and read interfaces and manuals. It also speeds up your day-to-day progress in music production.
This article is for beginners and experienced users who want to strengthen their technical foundations. Its topic-based structure helps you quickly find an effect, tool or function.
Practical uses: open a project, add a plugin, adjust a track, edit MIDI or export a song while getting to grips with the terminology. Bookmark this article as a quick reference during your sessions.
Introduction to the English music production glossary for 2025
Getting familiar with home studio terminology speeds up production and makes opening a project less daunting. The aim here is simple: provide useful definitions that save you time.
The computer is central to the work. Knowing settings such as buffer size, sample rate and tempo helps you avoid many technical problems.
This glossary covers several groups of terms: plugins (instruments and effects), audio formats (WAV and MP3), audio and MIDI, routing, mixing and mastering.
In 2025, most tools are evolving quickly. An up-to-date glossary reduces the stress of starting a song and makes creating music smoother.
Each definition includes a simple use case and a related action: drag in a plugin, adjust an EQ, automate a filter or export a clean signal.
Do not worry if you know little at first. Revisiting these words across several projects is the best way to improve.
How to use this glossary to progress faster
This glossary becomes a practical tool when you consult it as you work through a project. It cuts the time spent searching for a function and helps you put what you learn into practice in the studio.
Search by letter and by category
Bookmark this article so you can return to it instantly. An alphabetical index lets you jump straight to the first letter of a word.
You can also filter by topic: tracks, effects, routing, MIDI or monitoring. These categories help you find the right word for the stage of the mix you are working on.
Audio examples and home studio use cases
Connect each definition to an audible example. For instance, open your software, insert an effect, change a setting and listen to the result.
- Write down frequently used words and make a short reference list of your own.
- Learn terms as you need them instead of trying to learn everything at once.
- Try things immediately: action + definition = better recall.
“Connecting glossary terms to simple actions clears up uncertainty.”
DAWs, software and the studio environment
A digital audio workstation brings together every stage of the work: recording, editing, organizing tracks and exporting a song.
DAW — Digital Audio Workstation: the software in which you compose, arrange and mix. Common examples include Ableton Live, Cubase, Logic Pro, Reaper and Maschine. Each tool works differently, but the concepts are similar.
Buses, tracks, projects and sessions
A project contains audio and MIDI tracks, buses and session settings. Use templates to save time and keep your structure consistent: drums, bass, instruments and FX.
Plugins, VSTs and common formats
Plugins and virtual instruments often use the VST format (or AU/AAX, depending on the system). You can insert an effect on a track or send a signal to a reverb bus.
- Set your audio preferences (interface and sample rate) for a clean recording.
- Choose WAV for its quality, while keeping in mind that it takes up more disk space.
“Organizing your tracks makes mixing easier and speeds up production.”
To compare the leading tools and choose a good starting point, see this guide to the best DAWs.
Audio and MIDI: key concepts and essential settings
Knowing when to record an audio signal and when to capture MIDI commands changes how you work.
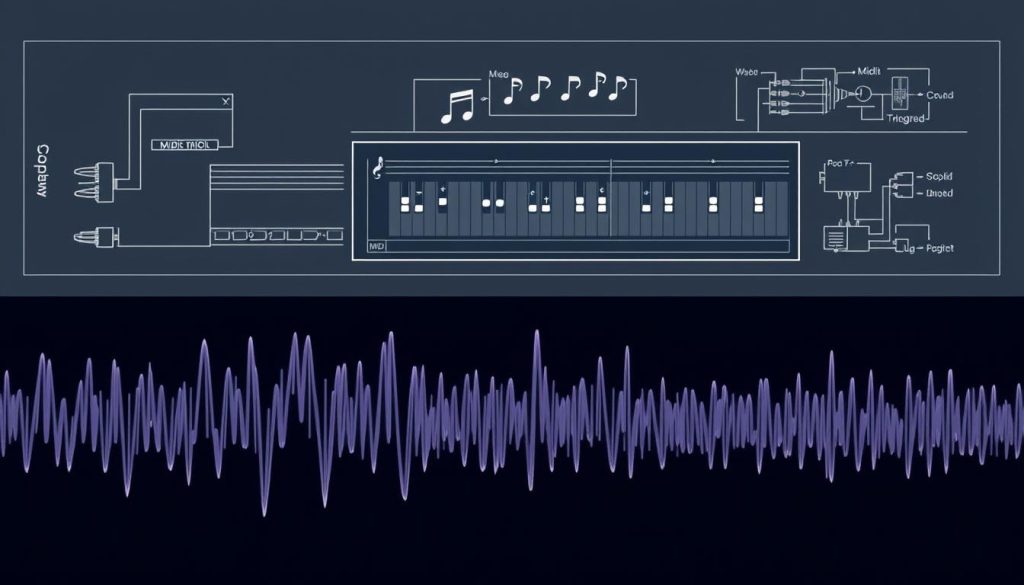
Audio is a fixed recording of sound: it captures the resulting sound. For better quality, choose WAV. Common sample rates are 44.1 kHz and 48 kHz; they affect recording quality and file size.
MIDI transmits notes and control data (velocity, faders and knobs). It contains no sound: it controls a virtual instrument that produces the sound.
Expression and controls
Velocity indicates how hard a note is struck. Aftertouch changes expression after a key has been pressed. Pitch bend provides a continuous slide between pitches for expressive effects.
- Edit notes and quantize their timing to tighten a performance.
- Adjust controllers to shape the performance in detail.
- Think about the mix: manage the volume of audio tracks and MIDI-controlled instruments.
| Aspect | Audio | MIDI |
|---|---|---|
| Contents | Recorded sound signal | Data (notes and controllers) |
| Editing options | Limited without processing | Easy to edit |
| Recommended format | WAV (quality) | Standard MIDI (control) |
| Equipment needed | Microphone, preamp and interface | Keyboard or controller and a software instrument |
For a more extensive reference covering terminology and other settings, see this comprehensive glossary.
Tracks, signal and volume management
Keeping track levels under control prevents unpleasant surprises during mixing. Understanding the meters helps you make quick, precise decisions.
Peak is the signal’s highest instantaneous level, RMS gives an average level, and dynamic range is the difference between quiet and loud levels.
Leaving enough headroom on every track and on the master protects against clipping. Clipping creates unwanted distortion and reduces signal quality.
Gain controls the input level; the fader adjusts the channel’s output volume in the software. Setting gain before touching the fader is good practice.
- Aim for sensible levels on each track to keep the mix clean.
- Use level meters to watch peaks and average levels.
- Organize tracks and subgroups to balance the overall mix.
For a refresher on these concepts, see this music production glossary.
Essential mixing effects
Essential processing turns a raw track into part of a coherent mix.
EQ shapes frequencies. Use high-pass (HPF) and low-pass (LPF) filters to remove unnecessary extremes. The cutoff sets the filter’s cutoff frequency. Make small adjustments to preserve the character of the sounds.
Compressor: it reduces peaks above a threshold. The ratio sets how strongly it compresses, and the release controls how quickly the level returns to normal. To smooth a vocal or give drums more punch, adjust the threshold and ratio to suit the attack and sustain.
A de-esser and a noise gate help clean up the signal. A de-esser reduces sibilance (“s” sounds); a gate cuts the signal below a threshold to reduce background noise.
Reverb recreates a sense of space and places sources at different depths. Delay creates echoes; feedback controls the repeats, and tempo sync aligns the delays with the BPM to keep them in time with the project.
- Typical chain: corrective EQ → compression → reverb/delay via sends.
- Always test each effect by turning it on and off (bypass) to hear its impact.
- Listen to processing in the full mix, not only in solo.
To explore home studio terminology further, see this home studio glossary.
Modulation, synthesis and sound design
Synthesis and modulation often define a sound’s character from the first note. This section explains the essential tools for shaping instruments and creating lively textures.
ADSR — Attack, Decay, Sustain, Release
ADSR is the envelope that governs how a sound begins, holds and fades away.
Shorten the attack for a fast start, and lengthen the release for a longer fade. On a sampler or synth, changing these settings can completely alter how a sound feels.
LFOs and waveforms
An LFO changes a setting periodically, producing effects such as vibrato, tremolo or a filter that moves over time.
Choose a waveform (sine, triangle or sawtooth) and sync it to the tempo for consistent rhythmic modulation.
Modulation effects and autopan
Chorus, flanger and phaser widen and color the timbre. Autopan moves a sound across the stereo field.
- Chorus: creates a subtle doubling effect.
- Flanger: creates pronounced overlapping and sweeping effects.
- Phaser: shifts spectral phase for subtle coloration.
Glide, portamento and polyphony
Glide connects two notes smoothly. It works especially well for expressive leads and basses.
A mono synth plays one note at a time; a poly synth plays several. Choose according to the musical phrase.
Tip: combine the envelope and LFO, and let the key and velocity influence settings for natural performances.
| Function | Purpose | When to use it |
|---|---|---|
| ADSR | Shapes the attack and decay | On synths, samples and vocals |
| LFO | Periodic modulation (vibrato/tremolo) | To create rhythmic movement or texture |
| Chorus/Flanger/Phaser | Widen and color the timbre | On pads, guitars and keyboards |
| Glide / Mono and Poly | Smooth transitions / number of notes | Leads, basses and chords |
Routing, auxiliaries and panning
Routing organizes the signal path in a session so that every element remains clear.
Insert and send: an insert places an effect in series on a track to process its sound directly. A send routes a copy to a return (auxiliary) track for parallel processing.
An auxiliary send is useful for sharing a reverb or delay across several tracks. You can adjust how much of the same effect each track receives without loading multiple instances.
Pre-fader and post-fader: a pre-fader send remains independent of the fader. A post-fader send follows the track volume and changes with the mix.
Panning positions a sound from left to right and builds the stereo image. Setting pan and balance carefully reduces masking and makes the mix clearer.
A typical setup uses a post-fader reverb bus and a pre-fader headphone bus for consistent monitoring. Watch input and output gain to maintain consistent levels.
Automate sends over time to create transitions and depth. Finally, keep routing easy to follow so you can save time and prevent phase problems.

To expand your vocabulary, see this music glossary.
Plugins, virtual instruments and presets
Understanding plugin formats and how they work helps prevent compatibility problems. VST and AU remain the most common formats, depending on the operating system and host software. Check whether you need a 32-bit or 64-bit version and confirm your computer’s architecture.
VST, AU, bundles and bypass
A bundle groups several tools together and can offer a coordinated set of effects and instruments at a lower cost. Bypass turns off an effect without changing the original signal, making it useful for comparing processed and unprocessed sound.
Virtual instruments, layering and presets
Virtual instruments let you play notes with a MIDI keyboard. Presets provide ready-made settings so you can get started quickly. Change the filter, envelope and resonance to fit the sound to your music instead of leaving a patch untouched.
Layering combines sounds, such as a pad and a pluck, to enrich the timbre without raising the volume too much. Plan for CPU and RAM use: demanding plugins may require optimization through freezing, bouncing or stems.
Tip: organize presets by style and function so you can quickly find a sound during a session.
Sampling, samples and loops
Starting with a loop or a one-shot helps you build a song faster.
Sample: a piece of audio (preferably WAV) used as a sound element. A one-shot is a single sound (kick or clap); a loop is a repeatable passage (hi-hat or groove).
Stems are groups of tracks (drums, vocals or bass) exported as audio. They reduce CPU load, make it easier to work between studios and help prepare a live set.
Samplers and sound libraries
A sampler loads multisampled libraries so you can play an instrument through MIDI. It can assign piano or drum sounds to different keys for real-time performance.
- Examples: a kick one-shot, a hi-hat loop and a drum stem to retain the groove.
- Check sample levels so they fit with the existing tracks.
- Name files using a style_tempo_key_example pattern (for example, techno_120_C_kick01) so you can find sounds quickly.
Mixing tip: apply EQ and compression to make sources from different collections sound consistent. Drums often benefit from layering claps and snares to enrich their timbre.
| Element | Typical use | Benefit | When to use it |
|---|---|---|---|
| One-shot | Kick, clap | Rhythmic precision | For transients and layering |
| Loop | Hi-hat, groove | Quickly builds a foundation | When you want a repeating pattern |
| Stem | Drums, vocals | Lower CPU use and easier sharing | Before an export or live performance |
| Library | Multisampled sampler | Play an instrument through MIDI | For performances and variations |
Rhythm and drums in music production software
Rhythm is the backbone of a song and guides the other instruments. Drums include acoustic or synthetic elements: kicks, claps, hi-hats and percussion make up a drum kit and create the groove.
Kick: it provides impact and low-frequency energy. Tune it if necessary and adjust its attack so it is audible without masking the bass.
Clap and snare: they punctuate the rhythm and mark the backbeats.
Hi-hat: it marks the beat and meter. Its velocity and placement add swing and movement.
Programming and organizing
Program a simple repeating pattern, then develop variations along the timeline. Put each element on its own track so you can control volume and apply different effects.
Edit MIDI notes: vary their velocity and add small timing offsets (humanization) for a natural result. Try drum kit presets as a starting point, then adapt them.
| Element | Role | Practical action | Mixing tip |
|---|---|---|---|
| Kick | Rhythmic and bass foundation | Tune it and adjust the attack | Low-cut EQ if needed; parallel compression |
| Clap / Snare | Rhythmic accents | Layer sounds to add body | Compress gently and emphasize transients |
| Hi-hat | Defines the groove | Vary velocity and placement | High-pass filter and a slight delay for space |
| Percussion | Color and secondary rhythm | Place sounds on separate tracks | Short reverb via a send for cohesion |
Tempo/BPM sets the framework. Accurate timing keeps every element synchronized. For a full refresher on rhythmic terminology, see this music production glossary.
Monitoring, listening and headphones
The final sound of a mix depends as much on the monitors as on the room they are in. Good monitoring reveals the signal as it is and makes it easier to balance the instruments.
Studio monitors and frequency response
Studio monitors aim for a neutral sound, unlike hi-fi speakers, which may color sound for enjoyable listening. A flat frequency response provides reliable information for making decisions.
Frequency range describes the span of frequencies reproduced. The wider and more even it is, the more low frequencies and harmonics useful to the mix you can hear.

Studio headphones: open or closed
Open-back headphones offer a wider stereo image and work well for mixing. Closed-back headphones provide isolation and reduce sound bleeding into microphones during recording.
Choose headphones for your main task: open-back for mixing, closed-back for recording vocals. Connect them to your audio interface to keep your working level and volume under control.
“Good monitoring reveals flaws, not your preferences.”
- Position the monitors in an equilateral triangle at ear height.
- Add basic acoustic treatment to the room, especially at the first reflection points.
- Always check your mixes on several systems: monitors, headphones and earbuds.
Keep your working volume in check to avoid fatigue, and use consistent reference levels when making music with your software.
Recording, latency and audio interfaces
Setting up your interface correctly can make a major difference to recording quality. The interface converts audio, manages inputs and outputs, and connects your headphones and studio monitors.
48 V phantom power: it powers condenser microphones. Built-in preamps provide clean gain and play an essential role before recording.main function before recording.
Buffer size, latency and performance
Buffer size affects latency: a small buffer reduces delay but increases CPU load, while a large buffer provides greater stability when mixing. Lower the buffer size to play and record, then raise it when mixing with many effects.
Punch in/out and overdubbing
Punch in/out automates the start and end of recording so you can redo a specific passage without interrupting your creative flow.
Overdubbing lets you layer takes (vocals, guitar or doubled parts) while keeping the groove in time.
- Check the input volume to avoid overloading the signal.
- Update the computer’s drivers and optimize the software to reduce dropouts.
- Also check the headphone level for a clean studio recording.
“A well-configured interface protects the recording and frees you to create.”
Mixing and mastering techniques
Adjusting levels and spatial placement turns several tracks into a coherent whole. Mixing gives each element its place for a clear, balanced result.
Mixing, levels, balance and quality
Mixing balances levels, positions elements in the stereo field and manages dynamics. Adjust each track’s volume, shape its frequency spectrum and check how the instruments and vocals work together.
Side-chain compression and creative ducking
Side-chain compression uses another source, often the kick, to trigger compression on a signal. This technique makes room for the kick when it hits by lowering the bass. It can also create rhythmic effects of varying intensity.
Limiters and the goals of mastering
A limiter is an extreme compressor that prevents a signal from exceeding a target value. It controls the final level of a song to bring it in line with current references.
- A simple process: clean up (EQ) → control (compression) → add space (reverb/delay) → automate → limit.
- Keep the tracks consistent for better perceived quality.
- Always compare with a reference to judge loudness, level and frequency balance.
“Working in stages in your software brings precision and speed.”
Music production software in English: terms to know
Here is a quick glossary of the English words most often found in interfaces. Use it as a reference to connect each word to an action in your DAW.
Quick glossary of common terms
DAW = Digital Audio Workstation. Track = an individual recording or instrument lane. Bus = a shared signal path. Insert / Send: an insert processes a track in series; a send routes audio to a return.
EQ / Filter: HPF / LPF, cutoff = the filter’s cutoff frequency. Compressor: threshold, ratio, release. Reverb / Delay: feedback, tempo sync. Pan positions the signal in the stereo field.
MIDI: notes, velocity, aftertouch, pitch bend. Preset / Bypass, layering, side-chain, master / limiter.
Useful definitions and reference points
- Cutoff = the filter’s cutoff frequency, useful for cleaning up a sound.
- Threshold, ratio and release = key compressor settings.
- Insert and send = direct processing and shared processing.
Tip: reread this glossary several times and try each item in your software. These words appear repeatedly, and practice strengthens your understanding.
Practical examples to understand the terms in context
Follow these short workflows to turn a concept into an action on a track. Each example shows a simple, repeatable step.
Build a track with instruments, effects and automation
Load a virtual instrument, program MIDI notes and adjust their velocity. Insert an EQ to clean up low frequencies, then apply gentle compression to smooth the signal.
Send the track to a shared reverb (a post-fader send) to control the ambience in each section.
Automate the cutoff and volume over time to set up a drop. Add a tempo-synced delay at the end of a phrase.
Optimize a session for a better mix
Add samples (one-shots and loops), check their input levels and normalize them if necessary. Set the level of each track in the context of the full mix.
Group tracks by type, give them colors and name them. Freeze or export demanding tracks as stems when the computer reaches its limits.
“Putting these simple steps into practice turns words into habits.”
| Stage | Action | Goal |
|---|---|---|
| Creation | Virtual instrument + MIDI notes | A programmable melodic foundation |
| Processing | EQ → compression → reverb send | Clarity and space |
| Automation | Cutoff and volume | A dynamic transition |
| Optimization | Freeze / export stems | Save CPU resources |
Conclusion
Keeping a practical reference close at hand reduces hesitation and supports creative work. This glossary brings together the essentials to save time and navigate your studio software and music sessions more easily.
Every term becomes meaningful when you apply it to a track. Try a plugin, change a setting, note which action changes the sound and repeat.
Refine your listening: judge the effect, adjust the volume and watch the signal. This practice improves the quality of the song and your productions.
Whatever instrument you use and whatever your workflow, take a practical approach. Return to this glossary over time and expand it as needed.