
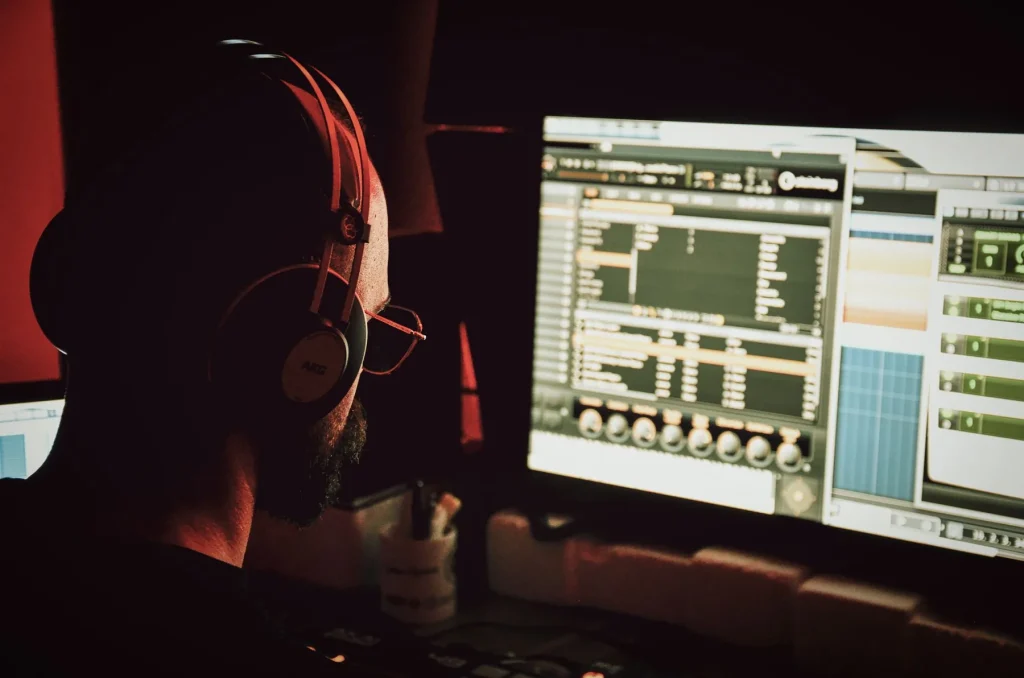
This easy-to-use hub brings together PDFs, checklists and step-by-step guides to help you progress in computer-based music production without wasting time searching online.
Here you will find resources organised by topic: fundamentals, harmony, scales, arrangement, song structure, mixing and mastering, as well as software such as Cubase, Logic Pro X, Ableton Live, FL Studio and Pro Tools.
The goal is simple: understand the fundamentals, finish your tracks and improve their sound quality.
Each section explains what you will learn, why it matters and how to apply it right away. Concise reference sheets and exercises with answers help turn theory into instinct.
The hub follows a path from beginner to advanced level. It covers the entire creative process, from an idea to a finished track, with concrete case studies—such as an analysis of “Billie Jean”—that make the concepts practical.
Our promise: leave with useful resources and a simple plan to save time and reach your goal this year.
Welcome to the free music production resource hub
Quickly find lessons suited to your level. A topic-based contents list puts the key sections just a few clicks away.
Each section contains concise lessons, PDF reference sheets and a practical checklist to reinforce the fundamentals without information overload.
The hub is organised into learning paths: beginner essentials; harmony (chords, intervals and scales); song structure; exercises with answers; mixing and mastering; and software (Cubase, Logic Pro X, Ableton, FL Studio and Pro Tools).
If you are just starting out, begin with “Beginner Essentials”, then move on to the quick-start guides. The material is impartial and educational, without empty promises.
Set yourself one small goal each day (master a concept or write down an idea). Keep a record of what you have learned so you can measure your progress and revisit topics that need work.
Benefit: everything is designed for use in a home studio, with practical checklists that save time day to day.
Free PDFs and resources for learning music production
Get started quickly with a straightforward pack covering the fundamentals and a first-week checklist. The kit includes the “Beginner Essentials” PDF, a music production glossary and a short lesson on notes, accidentals and intervals.
What to do first: connect your audio interface, set the buffer size and test your microphone or instrument input. Check the metronome and make a test export.
- Starter pack: beginner essentials PDF and glossary.
- “First week” checklists: session template, naming, backups, tempo, buses and effect sends.
- Quick tips: useful shortcuts, genre templates and essential plugins (EQ, compressor and reverb).
Common problems: latency, levels that are too high and no input signal. Simple fixes can save you time.
Before each session, fill in a short checklist: goal, tasks, duration and backup. Ask questions in the comments or keep a log so you can return to anything that holds you up.
Learning paths by level: from beginner to advanced
A step-by-step plan helps turn an idea into a finished track. Follow clear stages to strengthen each skill and move towards your goal more quickly.
Beginner level
Prioritise the fundamentals: navigating your software, making clean recordings, and learning basic chords and scales.
Short lessons and practical exercises prevent information overload. The aim is to make simple, clean recordings and then build your first song structure.
Intermediate level
Work on arrangement, sound design fundamentals and consistency between sections.
Learn to finish tracks by completing whole projects. Alternate between theory and hands-on work.
Advanced level
Structure your sessions: preparation, rough balance, EQ and compression, depth (reverb and delay), then finalisation.
A guided programme (personalised assessment, video lessons and monthly feedback) can help if you need more structure.
Progress tracking
- Weekly goals
- Time allocated to each skill
- Reviewing and adjusting your target level
| Stage | Priority | Expected outcome | Suggested time |
|---|---|---|---|
| Beginner | Fundamentals, recording | First playable tracks | 2 to 4 weeks |
| Intermediate | Arrangement, structure | Finished, repeatable tracks | 4 to 8 weeks |
| Advanced | Mixing, mastering, strategy | Professional sound quality | 8 weeks or more |
Useful theory and harmony for producers
A solid grounding in theory helps producers choose chords and inversions that work in the studio. In practice, knowing a few chord families and how to use them can immediately improve a track.

Notes, accidentals and notation
Quick reference: learn notes, accidentals and English note names to move between the keyboard and sheet music. A short music theory course makes these ideas easier to use while composing.
Basic chords and inversions
Learn major, minor, diminished and augmented triads. Practise close-position inversions for an intimate sound and open voicings for a broader sound.
Extensions and seventh chords
Use sixth, sixth-and-ninth, ninth or eleventh chords to add colour to an intro or chorus without overcrowding it. Seventh chords can add a gentle colour or serve a dominant function, creating tension followed by resolution.
- Avoid parallel motion; try different inversions as you move between chords.
- Connect chords and scales: choose a scale and improvise a simple melody over the chords.
- Build your skills gradually: start with triads, then add extensions little by little.
“Test only a few changes at a time so you can hear what each one adds.”
Scales, modes and musical colour
Mastering a few scales opens up a world of harmonic variations for your tracks.
What should you remember? PDF reference sheets on major and minor scales can speed up the writing of coherent melodies and bass lines.
Modes and alternative scales
Explore the diatonic modes (from Ionian to Locrian), then alternative scales such as the whole-tone and octatonic scales.
The pentatonic scale remains a reliable starting point for quickly creating an effective melody.
Jazz: circle of fifths and ii–V–I
The circle of fifths helps you remember key signatures and build strong progressions.
Learn to construct a ii–V–I that suits your chosen style and gives the track a clear sense of tension.
- Tips: transpose one idea into three modes to compare their colours.
- Write down one idea a day, changing the scale to expand your collection of themes.
- Review in short sessions over the years instead of relying on occasional marathons.
| Goal | Tool | Outcome |
|---|---|---|
| Melodic lines | PDF reference sheets on major and minor scales | Find ideas more quickly |
| Harmonic colours | Diatonic modes and alternative scales | Variations in timbre and tension |
| Jazz progressions | Circle of fifths, ii–V–I | Strong, recognisable cadences |
“Work little by little: repetition brings progress over the years.”
Harmonising melodies and building cadences
Harmonising means turning a melodic line into a clear progression that serves the track. Start by choosing chords that support the melody, then try inversions to create smooth movement between voices.
Modern voicings
Close voicings add density; open voicings create space. Tightly spaced voicings can increase intensity.
Use inversions to avoid abrupt leaps. Avoid moving every chord in parallel when you want the individual voices to remain distinct.
- Rule: keep each voice independent.
- Spread notes across keyboard, pads and guitar to prevent frequency buildup.
Cadences and quick reference points
Learn authentic, plagal and deceptive cadences, then look for stylistic equivalents that suit your music.
The ii–V–I and circle of fifths provide quick reference points when harmonising a melody in a production session.
Listening points: notice where a cadence prepares an ending or gives the track fresh energy.
“Try three different voicings over the same melody and compare the results.”
Exercise: harmonise one melody in three styles and follow a short practical lesson to turn it into a progression ready to record.
Song structure and finishing a track
The way you order sections can turn a loop into a complete track.
Explore common sections: intro, verse, pre-chorus, chorus, bridge and outro. Each plays a particular role in how listeners experience and remember a song.
Case study: “Billie Jean”
In this song, repeated motifs and small variations sustain interest. Its energy and the placement of its elements show how a simple idea can become a hit.
Writing a pre-chorus and an ad-lib
A good pre-chorus prepares the impact of the chorus through gradually increasing density, a slight rhythmic shift and harmonic tension.
An ad-lib extends the ending coherently, with melodic variations over a stable backing that do not crowd the mix.
A simple system for organising an idea
- Length markers (8, 16 or 32 bars).
- Density: instruments active in each section.
- Development: automation, filters and breaks.
| Section | Length | Goal |
|---|---|---|
| Intro | 8 to 16 bars | Establish the mood |
| Verse | 16 bars | Tell the story and introduce the idea |
| Chorus | 8 to 16 bars | Create a memorable impact |
A daily plan: day 1, outline; day 2, variations; day 3, finish the framework. Mini-lesson: turn an 8-bar loop into a song framework in 60 minutes.
Adapt these principles to your level and preferred styles (electropop, hip-hop or ambient). For more tools, see this practical toolkit, which brings together ideas and methods.
Exercises and downloads: practise every day
Practise daily with focused exercises that turn theory into automatic habits.

Exercise bank by topic: chord inversions, interval dictation, harmonising melodies and basic rhythms.
Weekly worksheets and a monthly plan
Practice sheet: a clear goal, estimated time, a completion check and space for notes. Work in short sessions five times a week to preserve your energy and establish the habit.
Self-assessment grids
Simple grids help identify strengths and weaknesses. They turn theory into playable habits and help you set a month-long plan.
- Exercises organised by level and topic.
- How to ask for feedback on an exercise: send an excerpt, explain the outcome you want and ask your questions.
- Involve others: pair up as listeners to compare results and stay motivated.
| Exercise | Duration | Goal | Outcome |
|---|---|---|---|
| Chord inversions | 10 to 15 min | Keyboard fluency | Smoother transitions |
| Interval dictation | 8 to 12 min | Relative pitch | More accurate melodies |
| Harmonising melodies | 20 to 30 min | Arrangement | Ideas for a current track |
Tip: connect every exercise to a real project. This gives the effort purpose and helps your creative life develop.
Daily practice for composers
Establish a short routine: 30 to 50 minutes, five times a week. The idea is simple: warm up, create something quickly, make a short arrangement and save your work. These simple, effective steps keep inspiration alive.
30- to 50-minute routines
Start with a five-minute warm-up (chords and scales). Then spend 20 to 30 minutes developing a rough idea.
Finish with 5 to 10 minutes for a quick export, notes and labels. Ending each session this way creates a ritual that protects your motivation.
Bass and treble pedal tones
Use a single or double bass pedal tone to anchor the key. Add a high pedal tone to steady the harmonic colour.
These sustained notes maintain energy and spark ideas during improvisation. They provide a constant foundation to build on.
“Consistency matters most: 50 minutes, five times a week, can bring progress within a few months.”
- Creative prompts: limit your choice of instruments, set a tempo or impose a rhythmic constraint.
- Track your time and note when you create best during the day.
- Reuse what works: label and archive useful ideas.
Monthly variation: change your sounds and try a small rhythmic challenge. Active breaks and rough-draft exports help you maintain the practice over time.
Film scoring in a DAW
Reading a screenplay with a musical ear helps turn scenes into sonic motifs. Begin by identifying dramatic intentions, key scenes and turning points.
Analysis method: read the screenplay, mark each scene’s intention, define thematic leitmotifs and establish a system of timecode markers (SMPTE). Create a session template for each cue and a clear naming system for the cues.

Floating harmonies and orchestration
Floating harmonies support the picture without overwhelming it. Use ambient textures, pads and clusters, then return to a defined cadence when the scene calls for resolution.
Orchestrating in a DAW: choose clear sample libraries, layer complementary timbres and control dynamics to create depth and perspective.
The composer’s mindset and workflow
Serve the film: accept revisions and stay calm when scenes change. Plan SMPTE markers, export clean stems and prepare multitrack deliveries with room in the schedule for revisions.
- Templates for each sequence and standardised cue names.
- Precise timecode markers for changes in the action.
- Separate stems (melody, pads, percussion and effects) for quick revisions.
| Stage | Tool | Expected outcome | Timeframe |
|---|---|---|---|
| Screenplay analysis | Notes, SMPTE markers | Leitmotifs and a thematic plan | 1 to 2 days |
| Mock-up | Template for each cue | Synchronised prototype | 3 to 5 days |
| Delivery | Stems, mix and notes | Client-ready result | 1 week |
Tip: take focused lessons to develop a consistent thematic language. A good practical module helps you connect production decisions to the finished result, as in this Logic Pro lesson.
“Music should serve the picture: simplicity, cohesion and careful listening are your best allies.”
Mixing and mastering: guides, tools and strategies
For clarity, follow a defined, timed workflow. Start with gain staging, then establish a static balance. These steps serve the mix’s goal: turning the production into a faithful, impactful result.
Workflow: gain settings → balance → corrective EQ → compression (single-band and multiband) → cleanup (de-esser, gate or expander) → space (reverb and delay on auxiliary tracks) → automation → timing checks.
Tools and practical techniques
EQ: give each element its place. Compression: add punch and control (use multiband compression when needed). De-esser and gate: clean up the sound. Limiter and maximiser: raise perceived loudness at the end of the chain without crushing the dynamics.
“Time each step and use a checklist: it makes the process easier to repeat month after month.”
Mastering method
Prepare clean exports (24-bit, with 6 dB of headroom). Check consistency between tracks, normalisation and the final sound for each platform. Good mastering software helps, but preparing the mix remains essential.
| Stage | Purpose | Suggested time |
|---|---|---|
| Gain staging and balance | Clarity and headroom | 10 to 30 min |
| EQ and compression | Definition and control | 20 to 60 min |
| 3D space and automation | Depth and movement | 15 to 45 min |
| Mastering preparation and export | Consistency and distribution | 30 to 90 min |
How to use your music production software
Knowing how to set up your audio environment quickly reduces frustration and speeds up creation. Start with step-by-step guides to the interface, audio preferences and recording in Cubase, Logic Pro X and Ableton Live.
Step-by-step guides: Cubase, Logic Pro X, Ableton Live
What do these guides cover? The interface, choosing a sample rate, buffer settings, basic routing and export. They show you how to record a vocal track, set up an audio interface and save a project properly.
FL Studio and Pro Tools: standard setups
Production templates, bus routing, and workflows for comping and export speed things up. For each program, list the project folders, useful shortcuts and preferences to set.
- Essential settings: sample rate, buffer, latency and session folder.
- Tips: macros, MIDI capture, effects racks and export presets.
- Choose a direction: recording instruments or programming MIDI—pick the appropriate template.
| Day | Goal | Outcome |
|---|---|---|
| 1 | Install and configure | Template ready |
| 2 to 3 | Record a first track | Clean recording |
| 4 to 7 | Edit and make a basic mix | Exportable demo |
A learning method: practise with purpose
Focusing on one specific goal in each session makes your practice more effective and reduces distractions.
Deliberate practice: assess your level, identify a skill to improve, then decide what to do during the session. Measure the gap and focus your time on one area at a time.
Deliberate practice: assess your level, set priorities, focus
Use a simple grid to record your strengths and weaknesses. Plan focused exercises and one small outcome to produce each week.
Progress in stages: compose, release and improve more quickly
Set milestones: demo, finished track, release. Each iteration should include feedback from others and a weekly review.
System: a goal journal, an end-of-week review and ongoing adjustments. Alternate theory lessons with project work to learn faster.
“Guidance through assessment and feedback helps you navigate an otherwise overwhelming amount of material.”
| Stage | Action | Outcome |
|---|---|---|
| Starting point | Assess your level with a grid | Clear plan |
| Priority | One skill each week | Measurable progress |
| Iteration | Compose and ask for feedback | Released tracks |
Planning, motivation and consistency
Building a realistic schedule starts with short, regular sessions. Choose blocks of work that fit your schedule and daily life.

Build a chain of habits: for example, 50 minutes, five times a week. Track your goals weekly with an app (such as Habit Hub) or a simple table.
Plan achievable goals by month. A programme such as “Finish an EP in 30 Days” gives you a clear target and motivation. Adjust the pace to your needs by scheduling more or fewer sessions around your commitments.
- Motivation boosters: small challenges and collaborations.
- Social support: forums and Meetup groups for quick feedback.
- Schedule rest days so you can keep going without burning out.
| Action | Frequency | Goal | Expected outcome |
|---|---|---|---|
| 50-minute routine | 5 times a week | Strong habit | Steady progress |
| Monthly project | Once a month | EP in 30 days | Finished release |
| Social sharing | Every week | Quick feedback | Greater motivation |
“Consistency makes the journey easier: a little effort at the right time is enough to move forward.”
Conclusion
Conclusion
A clear method makes music production simpler and faster. Start with a specific goal, break it down to suit your level and reserve a short block of time each day.
Consistent work over a few months is more valuable than sporadic effort over years. Release imperfect tracks: every finished track reveals what is holding you back and speeds up your progress.
Use the hub’s guides, reference sheets and lessons, ask trusted people for feedback and check off each stage. To go further with mixing, see this practical resource: a complete mixing guide.
Choose one thing to work on now, set aside time today and tick the first box in your plan. Take it step by step: music production will become more accessible.