
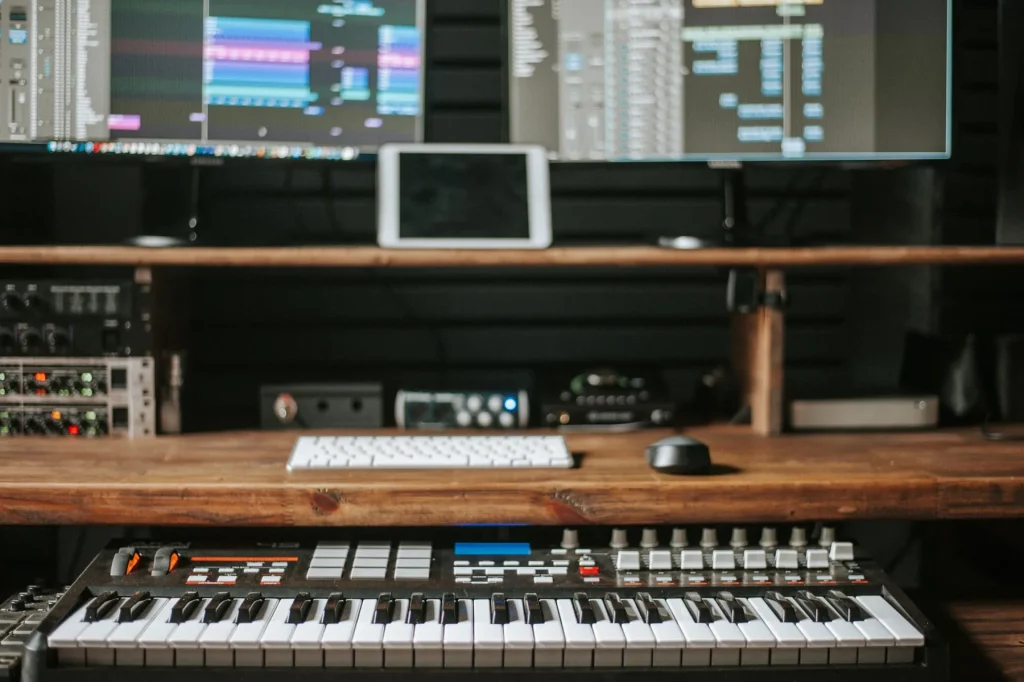
Entering the world of music production can quickly feel overwhelming. Many beginners get lost in a flood of information and want to master everything at once.
That approach stifles creativity. Create first, optimize later helps you avoid paralysis and stay motivated.
Before mixing, focus on simple steps: set up a reliable home studio, compose a melody, make a clean recording, and structure your track. Minimal equipment—a good DAW, a few virtual instruments, and headphones—is enough to get started with computer-based music production.
This article offers a step-by-step method and practical advice for turning ideas into tangible results. It emphasizes quick iteration: finishing small projects helps you learn faster.
For examples and a case study on speeding up your workflow, see this resource.
Build a foundation without drowning in information
Starting with simple ideas helps you learn faster than striving for technical perfection. Real progress comes from regular practice and finished projects. Focus on the essentials before trying to learn every detail.
Set your priorities: create first
Do not try to master mixing right away. In most cases, composing a good melody, recording cleanly, and refining the arrangement are enough to produce a convincing result.
Focus on the essentials: composition, recording, and arrangement
A basic setup consists of a stable DAW, a few dependable sounds, and a short routine. It saves time and prevents tool overload.
- Priority: finish a simple track before exploring mixing and mastering in depth.
- Do less, but do it well: use fewer tracks so you can better control the balance and energy.
- Break up the work into short sessions devoted to writing, recording, or arranging.
- Keep track of your actual needs as projects progress instead of buying equipment in anticipation.
- Take action when you get stuck: make a simpler version and improve it later.
“Regular practice > accumulating theory.”
This method makes learning smoother. If a problem stops you, try a simple solution and share your work. You will gain time and confidence, and see that a few well-chosen tools are enough to move forward in music production.
Complete Beginner’s Guide to Music Production Without Stress: Your Action Plan
A simple plan followed consistently turns learning into visible progress. Establish a daily routine: watch one or two targeted tutorials in the morning, then put what you learned into practice in the afternoon.

A seven-step path
Step by step, repeat the same sequence to build good habits.
- Make your setup reliable.
- Choose a suitable DAW.
- Compose a short idea.
- Make a clean recording.
- Program virtual instruments using MIDI.
- Work on dynamics in the arrangement.
- Mix with restraint.
In each session, write down one useful setting, one arrangement tip, one problem, and its solution. Over time, you will build your own guide.
- Aim to finish one complete track every one or two weeks to build experience.
- If a problem stops you, scale back the project by using fewer tracks.
- Change only one setting at a time to strengthen your work.
Listen to two or three tracks similar to what you want to create to guide your choices without copying them.
Choose a DAW and a computer suited to music production
A stable DAW and a responsive computer make every step easier, from composing to mixing. Before buying, check that your DAW works with your computer, and prioritize ease of use.
Ableton Live, GarageBand, and Pro Tools First: what are the differences for beginners?
GarageBand remains the simplest option on a Mac. It lets you learn the production workflow quickly without excessive complexity.
Pro Tools First appeals to people who want to understand professional studio conventions.
Ableton Live Lite offers versatile audio and MIDI tools and plenty of creative freedom, both onstage and when composing.
Recommended specifications: processor, RAM, and SSD storage
Aim for a multicore processor with four or more cores, at least 8 GB of RAM, and ideally 16 GB for greater comfort. An SSD for the operating system and your sessions improves performance through faster loading and less waiting.
Improve your existing computer without spending a fortune
Adding RAM and replacing your system drive with an SSD are the most effective upgrades. Keep a hard drive for sample libraries and move completed projects to an external drive or NAS.
Why the Ableton Live manual can become your best ally
The Ableton manual, at around 815 pages, explains effects, instruments, and workflows by topic. Reading the chapters relevant to your needs, then applying their advice through practical tutorials, helps you learn mixing and arrangement faster.
- Basic workstation: DAW, headphones, and a few virtual instruments.
- Add an audio interface when you begin recording to improve audio conversion and reduce latency.
- Choose your tools for their ease of use, not their quantity.
“Learning to use one tool on a small project is better than accumulating features you do not need.”
The minimum equipment for starting a home studio
A small, carefully chosen setup helps you progress faster in a home studio. Start with a stable foundation: a DAW, good headphones, and a few virtual instruments are enough for your first production.
Studio headphones or speakers: how to choose
Headphones reduce the influence of an untreated room. Closed-back headphones provide better isolation; open-back models offer a more natural soundstage.
Compare the closed-back Audio-Technica ATH-M50X with the open-back Beyerdynamic DT-990 Pro to hear the difference and refine your choice.
Audio interface, MIDI controller, and keyboard: useful now or later?
An audio interface becomes necessary if you record vocals or guitar. If you do not record audio, you can manage without one.
A MIDI controller or keyboard makes entering notes easier and more expressive, but is not essential at the start.
Avoid the trap of buying too much equipment
Every purchase takes time to learn. Prioritize quality over quantity: fewer tools, more finished tracks.
- Minimum setup: a DAW, headphones, and a few instruments.
- Start with headphones, then add speakers and acoustic treatment as your needs develop.
- A simple rule: keep it small and choose well.
Sounds, virtual instruments, and samples: build a useful sound palette
A good sound palette speeds up production and helps prevent creative blocks. Start with dependable libraries and sounds that suit your style.

Virtual instruments and MIDI tracks: realism and expression
A well-programmed instrument will sound more alive than an expensive library used poorly. Work on the notes, velocity, and articulations in MIDI.
Humanize your tracks with slight timing variations and automation of effects. They will sound less mechanical.
Working with samples: tempo, transposition, and slicing
Learn to use your DAW’s time-stretch feature: it is essential for aligning a sample while minimizing artifacts.
Follow a simple process: load a sample, detect its tempo, adjust it, slice it into segments, trigger them via MIDI, and arrange the result. This example works in most DAWs.
- Organization: group sounds by family, such as bass, drums, lead melodies, and pads.
- Combine virtual instruments and samples for a rich palette without multiplying plug-ins.
- Do not overlook the original recording: even a simple recording can be valuable.
- Build a small personal library of essential sounds to work faster.
“Trying demos and prioritizing sounds that suit your style helps you choose tools effectively.”
A daily workflow: from idea to finished track
Organizing your day into short blocks makes it easier to move a music project forward. In the morning, watch one or two focused tutorials. Quickly note one idea to test.
Devote the afternoon to practice: compose a sketch, program parts in MIDI, and record clean takes. This approach turns theory into skill.
An effective order of operations
Work in this order: compose the musical material, record it, build the arrangement, then think about mixing. Leaving mixing until later prevents perfectionism from stopping you.
Keep the listener engaged
Vary the density, register, and tone. Alternate busy and sparse passages, and add short pauses and dynamic changes to maintain energy.

- Small morning goal: learn one specific thing.
- Small afternoon goal: put it into practice.
- Simple outline: intro, verse, chorus, break, outro.
Write short notes after each session: what worked, what is holding you back, and what to do next. Make a first version, listen to it the next day, fix two or three things, then repeat. Finishing tracks gives you more experience and strengthens your motivation.
Finishing a track is better than polishing it forever.
Organization, workspace, and backups
Your studio setup directly affects your decisions and productivity.
Position your desk facing down the length of the room to limit reflections from the side walls. Place your monitors symmetrically and use headphones when the room is untreated.

Set up simply: acoustics, ergonomics, and cables
Place a few panels at first-reflection points and bass traps in the corners. A rug and heavy curtains can improve sound quality without a large budget.
Adjust your chair and screen height to protect your back. Keep your workstation tidy so you can quickly reach your tools and equipment.
Organize your wiring: bundle and label cables, and avoid loops. This helps limit interference and makes it easier to change your interface.
Backups and version management
Follow the 3-2-1 rule: keep three copies on two different types of storage, with one copy off-site in the cloud. Back up your projects after every session.
| Storage | Use | Benefit |
|---|---|---|
| External drive or NAS | Full copies of projects | Fast, local access |
| Cloud (Dropbox or Drive) | Off-site copy of essential files | Protection against disasters |
| Snapshots and versions | Archive of important stages (Projet_v1_2025-08-30) | Quick return to a stable version |
Maintenance for stable performance
Back up your work before updating software or plug-ins. Avoid updates in the middle of a production session.
Remove dust from your computer, keep free space on the SSD, and check drive health using SMART data. Schedule regular equipment checks.
“A tidy studio and reliable backups make work less stressful and quality more consistent.”
Conclusion
Finish tracks often: each one helps you improve your music production skills.
In summary: move forward in small steps. Choose a DAW, optimize your computer, keep your equipment to the essentials, and build a sound library with a few dependable virtual instruments.
Alternate tutorials with immediate practice to reinforce what you learn. Limit effects and track counts at first so you can better control the quality.
Next step: schedule a short 30- to 60-minute composition session today, followed by another session to arrange and listen. Share what you learned and note two things to improve based on your own work.
This article aims to make the world of music more accessible: Ableton Live or any other DAW can become a useful ally if you practice regularly.